How to deploy your Go app to Google Cloud Run
The updated way of deploying your Golang application to Google Cloud Run


In this article I will cover the 3 basic steps to get your Golang application from your local development environment to the cloud, specifically Google Cloud Run.
Containerise the application
Deploy the container to Artifact Registry
Ship the container from Artifact Registry to Google Cloud Run
If you are new to Google Cloud Run and want to know exactly what it's used for, look at my previous post:
Prequisites
A Google cloud project with billing enabled
Install the Google Cloud SDK to access 'gcloud' commands
Example Application Overview
To demonstrate the deployment process, we'll use a currency converter API built with Go Echo, a powerful web framework for Go. This application fetches currency exchange rate data against the base USD from the RapidAPI service.
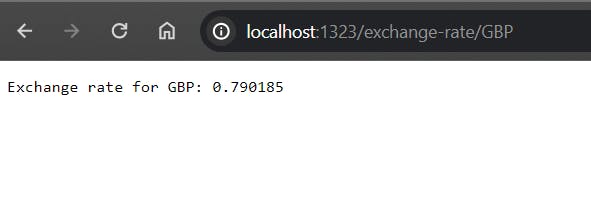
As you can see, my app is working on localhost port 1323, I just access the 'exchange-rate' endpoint followed by the currency I want to compare against USD and it provides me the exchange rate.
Containerizing your Golang app with Docker
The first step is to package all your code into a container, as we will later use this to ship our entire application to the cloud. Create a Dockerfile which suites your application. This containerization allows for easy deployment and scalability.
# Use an official Go runtime as a parent image
FROM golang:1.20-alpine

# Set the working directory
WORKDIR /app

# Copy the local package files to the container's workspace
COPY . .

# Build the Go application
RUN go build -o main .

# Run the application
CMD ["./main"]
Since my application is small, the Dockerfile remains straightforward and the lightweight Alpine image is used. Ensure that the Go version in the base image aligns with the Go version on your local machine.
Check your local Go version with go version
To build your image run:
docker build -t currency-api .
Using Artifact Registry to store our Docker image
Tagging your Docker image with a human-readable name aids local development, while the second tag in Artifact Registry format ensures compatibility and proper identification for smooth deployment on Google Cloud Run.
Google Artifact Registry is a container registry service provided by Google Cloud Platform, offering a centralized location to store, manage, and deploy container images, replacing Google Container Registry (gcr.io), which is being deprecated.
docker tag IMAGE REGION-docker.pkg.dev/YOUR_PROJECT_ID/YOUR_REPO/IMAGE:latest
docker tag currency-api europe-west2-docker.pkg.dev/fake-project-245/docker-repo/currency-api:latest
Click the link below to see the locations of Google cloud servers and choose the one closest to you (that is also available for Artifact Registry)
All the regions Google Cloud offers

Ensure you have Google Cloud authentication configured before pushing the image. Use the following command to set up authentication credentials for Docker:
gcloud auth configure-docker REGION-docker.pkg.dev --project=YOUR_PROJECT_ID
gcloud auth configure-docker europe-west2-docker.pkg.dev --project=fake-project-245
gcloud auth configure-docker adds the Docker credHelper entry to Docker's configuration file, or creates the file if it doesn't exist. This will register gcloud as the credential helper for all Google-supported Docker registries. If the Docker configuration already contains a credHelper entry, it will be overwritten.
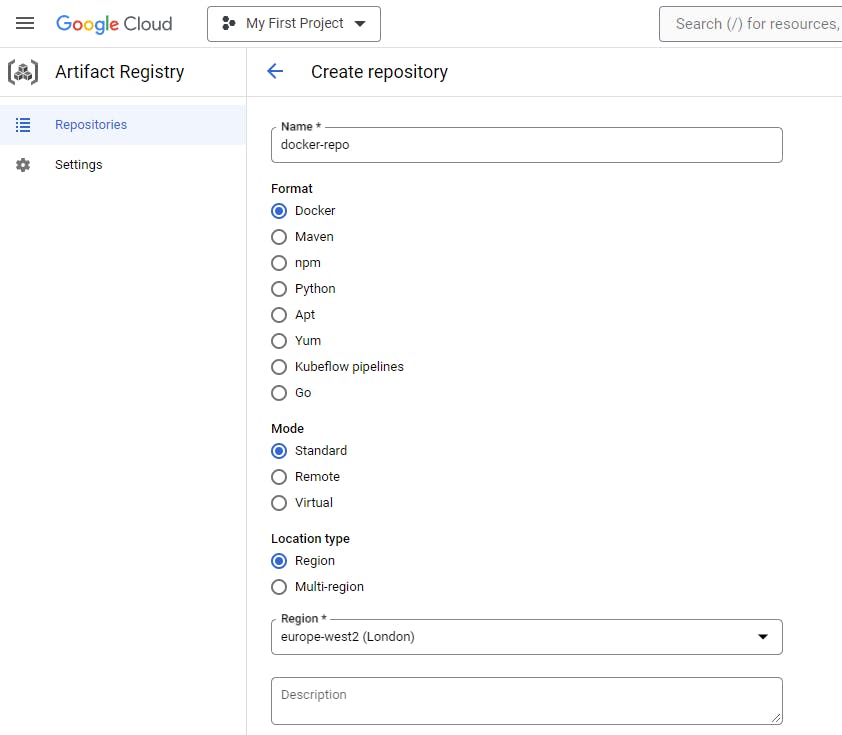
Inside the Google Cloud console, create the Artifact Registry repository that will be used to store the image like so: (choose the same region you used previously)
Then we will push our local Docker image to Artifact Registry:
docker push REGION-docker.pkg.dev/YOUR_PROJECT_ID/YOUR_REPO/demo:latest
docker push europe-west2-docker.pkg.dev/fake-project-245/docker-repo/currency-api:latest
Deploying container to Google Cloud Run
Head to your Google Cloud project's console (UI). Search for Cloud Run and verify that it's enabled. Click 'create service.' In the service creation interface, you'll find various configuration options. For this blog, we'll focus on specific settings, and some options won't be covered.
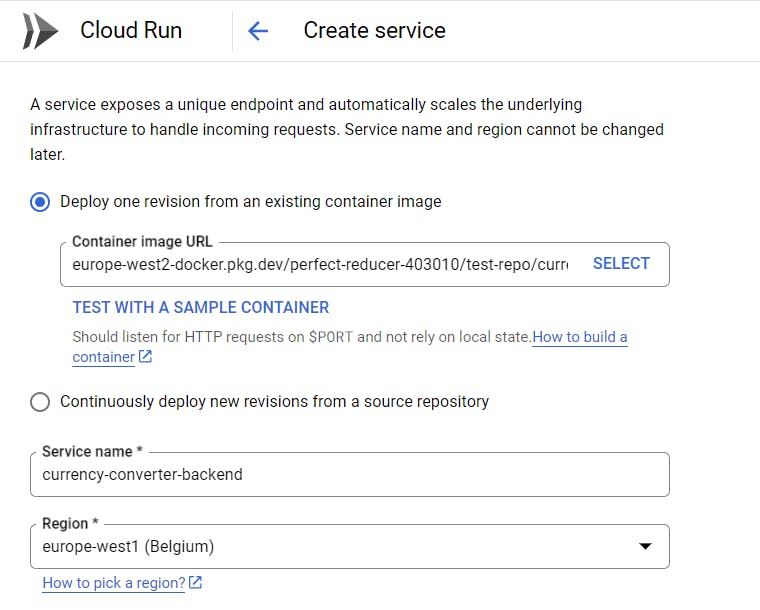
In the 'Container image URL' section, choose the Docker image you recently pushed to Artifact Registry. Assign a name to your service under 'Service name'; for instance, I named it 'currency-converter-backend.' Follow the convention of separating words with hyphens - instead of underscores _ . Opt for the region closest to you; note that some locations may have tier 2 pricing, so for smaller applications like mine, choose the nearest tier 1 pricing location.
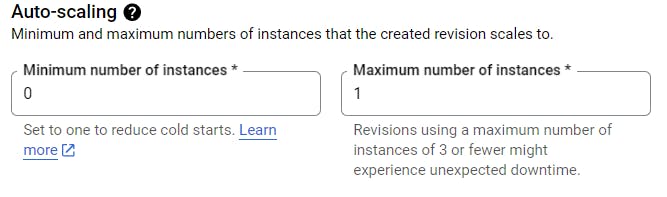
I've adjusted the maximum instances to 1 instead of the default 100. For applications expecting significant traffic, it's advisable to set a higher number. However, considering this is a test application, and to avoid potential costs from issues like DDOS attacks, it's best to keep the maximum instances low. In the Authentication section, it's recommended to set up authentication for production-grade applications. For testing purposes, select 'Allow unauthenticated invocations'. Lastly, ensure that the container port matches the port exposed in your Go application backend.
Then click create
You also have the option of deploying to Cloud Run from the command line using Cloud SDK, although I think the UI is very easy to use. If you want to do it with Cloud SDK, here you go:
gcloud run deploy SERVICE_NAME \
  --region=REGION \
  --platform=managed \
  --image=IMAGE_URI \
  --allow-unauthenticated
Copy the URL of your instance and test it in your browser. And here you can see I've accessed my app on the deployed version on the cloud, and it's working!

There are a lot of use-cases for Cloud Run but here I have shown you how to deploy a Go application. I suggest to explore the configurations of your instance whilst editing to further fit your needs. You have the flexibility of adjusting the number of VM instances your application will use, the amount of memory and the CPU size and access permissions for your instance (look into IAM for this).
That's all!
Thank you for reading this blog. I hope you now know how to deploy your Golang application to Cloud Run and are 1 step closer to becoming a level 100 cloud wizard.
And be sure to look at my other blogs on terminal3
Feel free to message me on LinkedIn: My LinkedIn
You can also email me here: thedoublewaysproject@proton.me