
In the ever-evolving landscape of web design, the integration of Scalable Vector Graphics (SVGs) has introduced a new realm of creative possibilities. In this blog, we will explore the combination of SVGs and interactive drawers in detail, offering a step-by-step guide to implementing this feature in your projects.
Watch the showcase of this animation here:
https://www.youtube.com/watch?v=uusVQ-ZVHVE
Codepen (all the code is here):
https://codepen.io/emre36/pen/KKbVgqj
Try it out:
Disclaimer
This blog aims to explain the process of creating this SVG drawer animation to help you better understand, I have linked the Codepen for this project above which contains all the code you'll need. I find images instead of code blocks to be more comprehensive so use this blog as a reference to the Codepen code. While this tutorial is for SVGs and drawers, I hope you find inspiration in the capabilities of using SVGs in your next project.
HTML
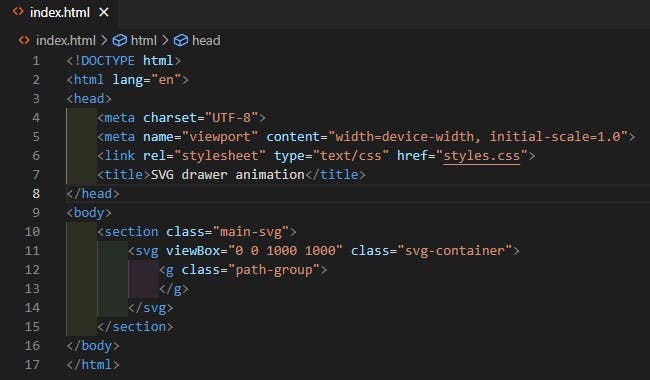
To start, create a basic HTML page and 3 tags in the body. A section with class main-svg, inside that an SVG with class `svg-container` and a <g> tag with class 'path-group'.
Creating the SVG
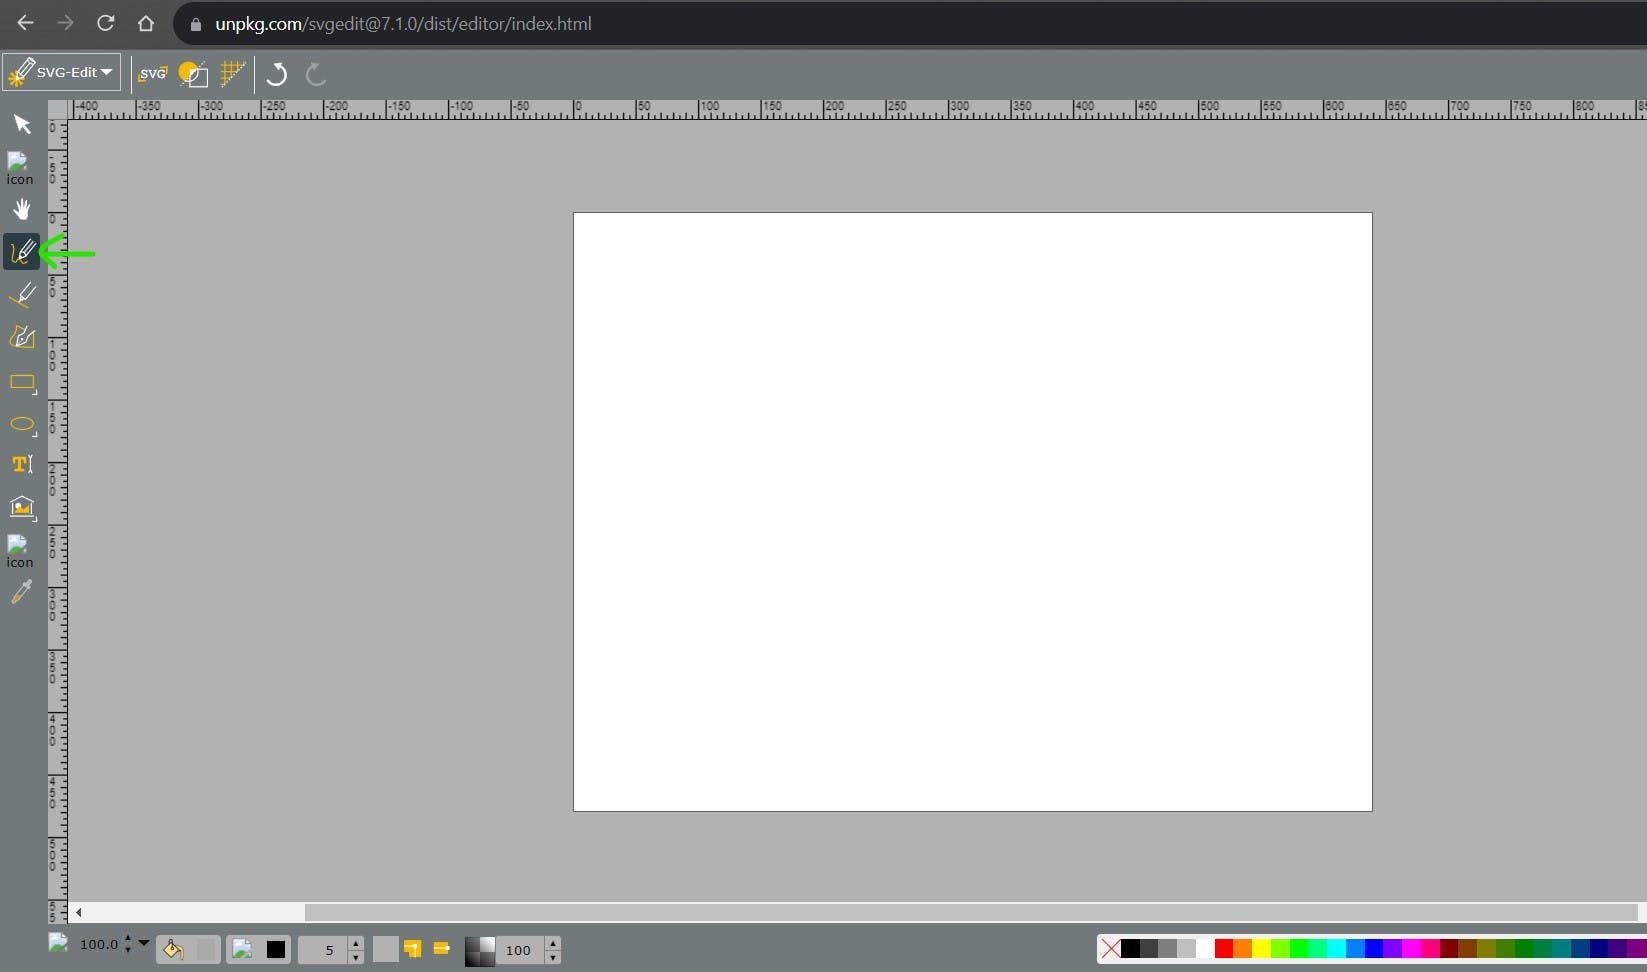
Now to create our SVGs we are required to use unpkg's SVG editor. It's a completely free online tool. https://unpkg.com/svgedit@7.1.0/dist/editor/index.html
Once you're on the tool, make sure to select the pencil draw icon and select the colour black.
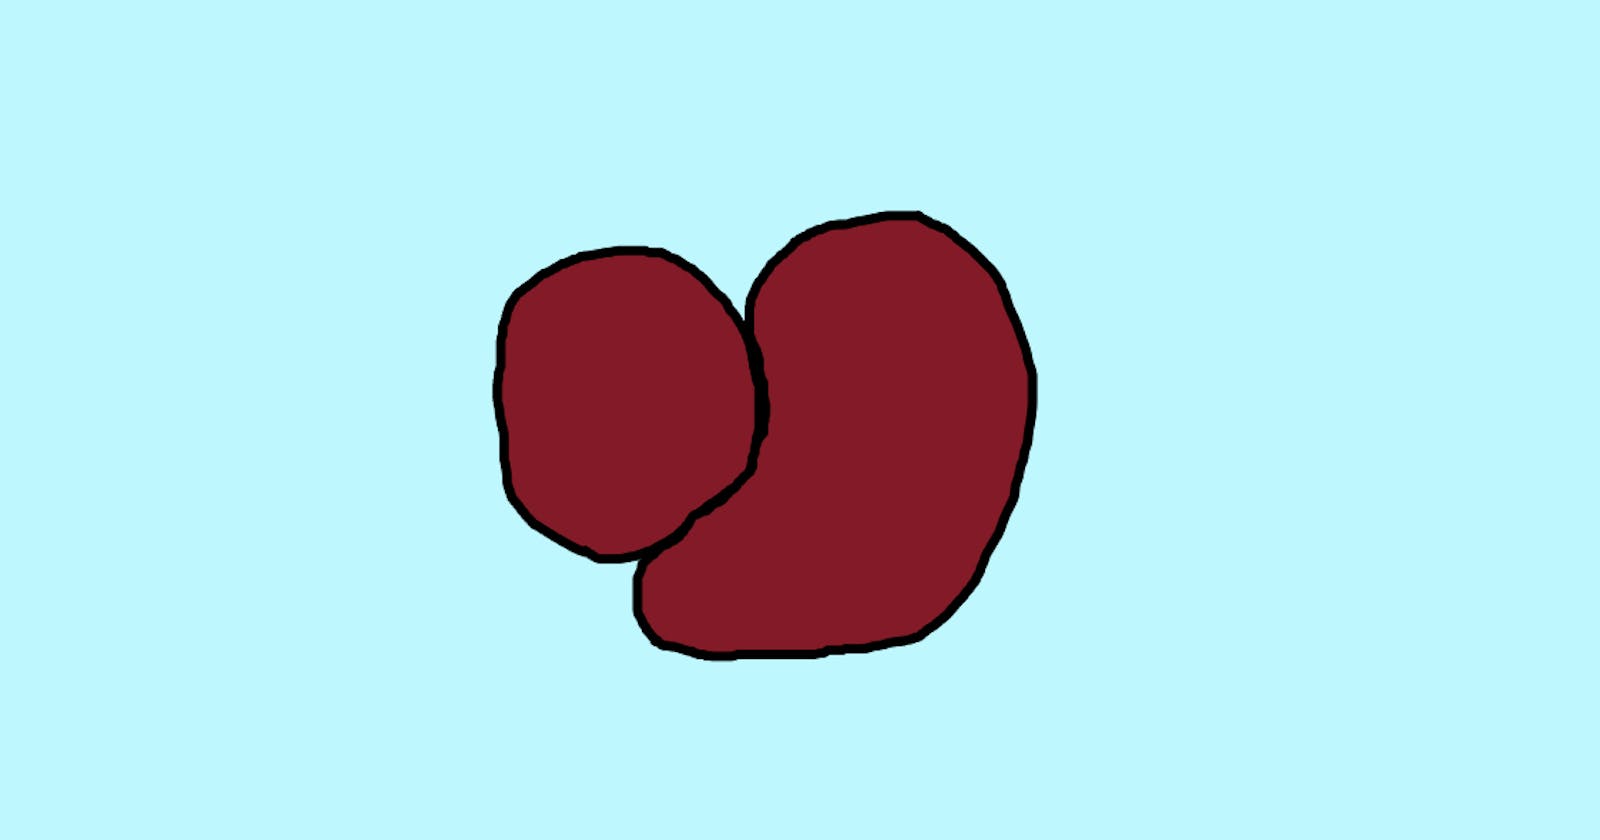
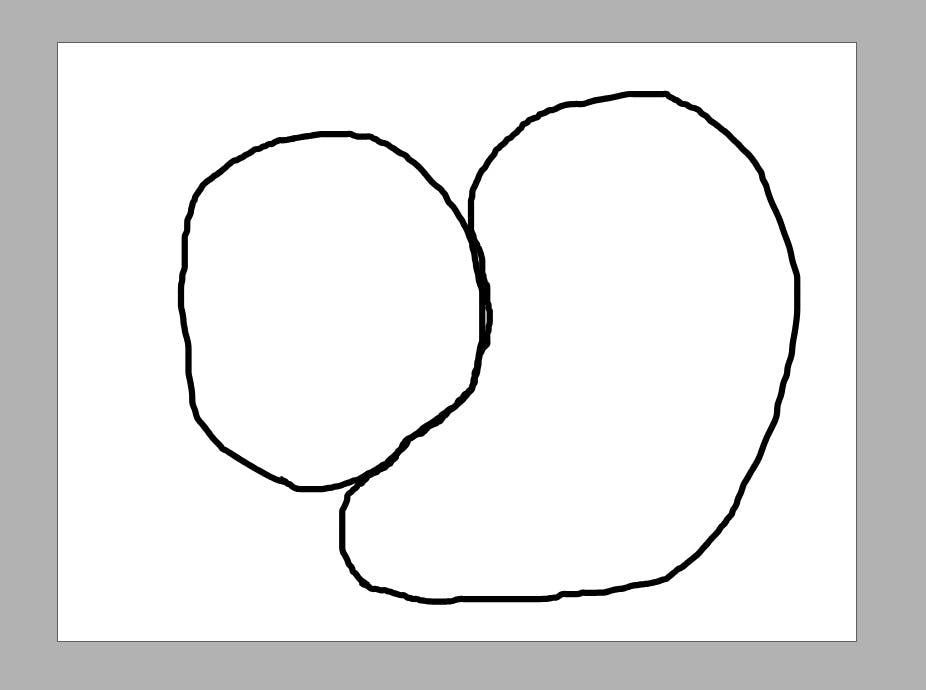
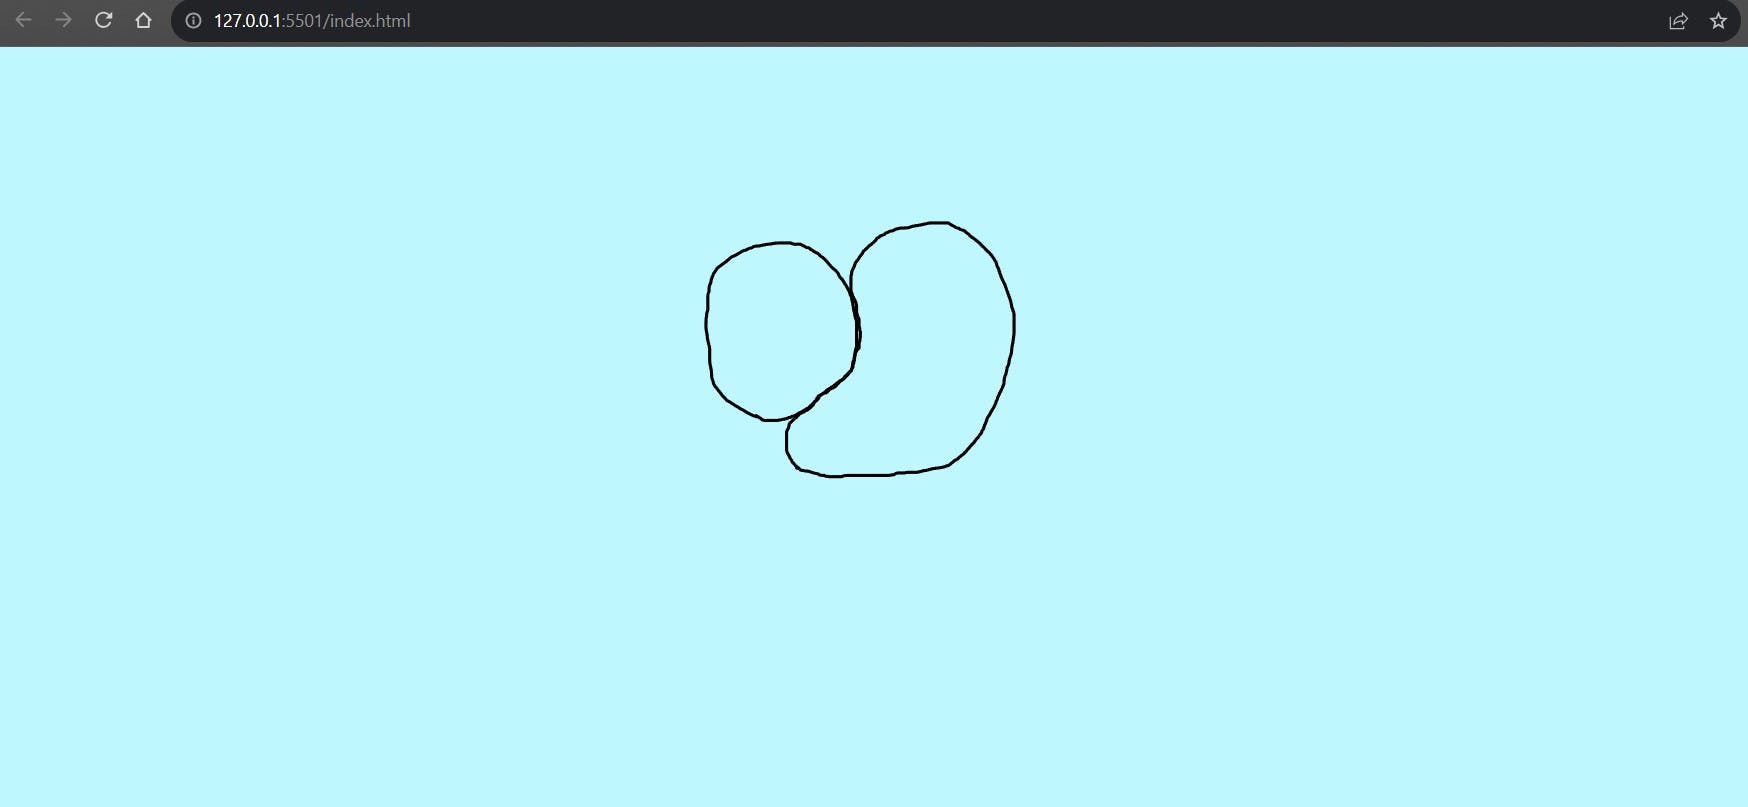
Here we drew a circle by hand. For this tutorial, we will stick to working with 2 circles but once you understand the process of working with these SVGs your designs can become substantially more complex.

Okay, now we've got this circle. There is a key step here! You must draw each shape you want to be an SVG SEPARATELY. Here's the trick: outline one shape, ensuring that both ends of the figure connect seamlessly. Then, move on to draw the second shape
It's worth noting that it's best to avoid creating overly complex shapes with too many strokes. Simplicity is your friend here. Focus on achieving one smooth stroke for each shape you're working on.
Now, let's move on to the next phase. Once you've successfully drawn the second shape, you might notice that it isn't perfectly aligned with the first one. This is a common issue, often arising from manually drawing shapes side by side. However, worry not—perfection at this stage isn't essential. The key takeaway is to ensure that each SVG is drawn in a single, continuous, and smooth motion.
Remember, if you attempt to draw an SVG in multiple disconnected strokes, the final result might not turn out as intended due to inconsistencies. Below is my rough drawing of 2 bordering shapes.
Once you've finished, press the SVG button highlighted here in the top left of the screen.

This pop-up will appear, and what you want to do is select everything from where it says path to the closing path tag. That is everything from here:
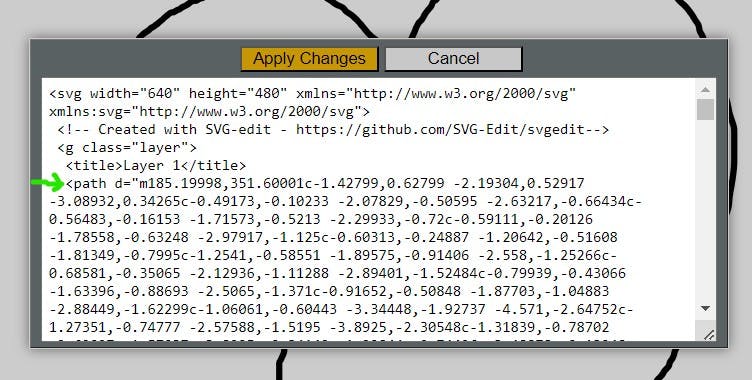
to here:
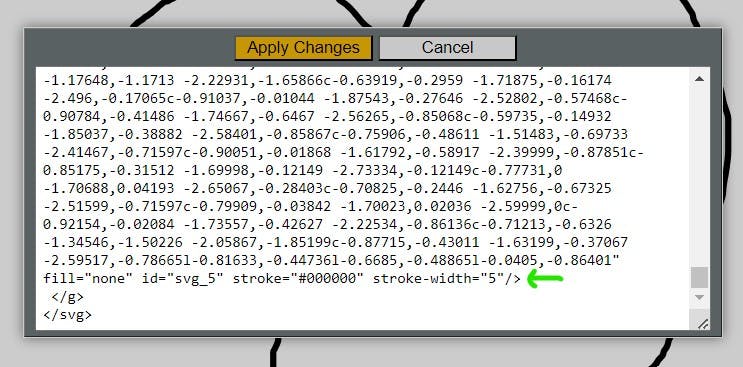
CSS
Loads of numbers, right? The path contains information about each pixel of the SVG you've drawn, essentially it is a map of the coordinates of your SVG. These coordinates form the essence of your SVG, making it unique to your design. No two people can draw the same design, and that's what makes SVGs truly individual.
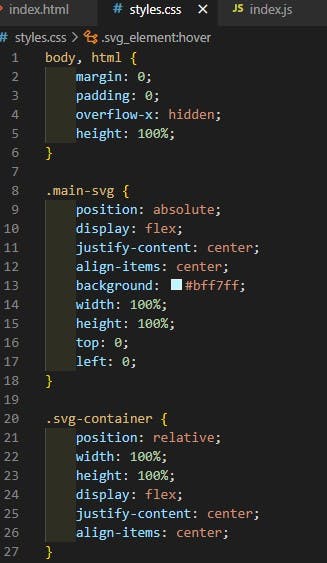
Now, let's transition to styling your SVG. To start, create a new file named styles.css. This file will be home to your CSS (Cascading Style Sheets) instructions that bring a touch of artistry to your SVG creation.
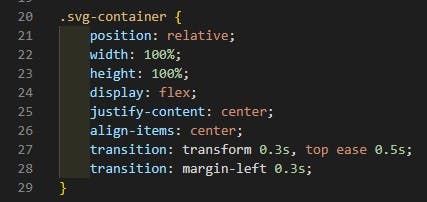
In styles.css, begin with some foundational properties. These properties will ensure that the components of your SVG are centred, creating a balanced and visually appealing composition. Don't worry if this sounds a bit technical – it's simpler than it seems.
To connect your CSS instructions to your HTML, there's one last step. Link your styles.css file to your HTML document by placing <link rel="stylesheet" type="text/css" href="styles.css"> in the head part of your HTML. This will bring your project to life.
Here's the current state of our progress: two barebone SVGs. Yet, little do they know what transformations await them.
Before we get into the Javascript let's add one more change. At the end of each SVG give a class of svg_element and an id of svg_1 (for the 1st SVG) and svg_2 for the second.

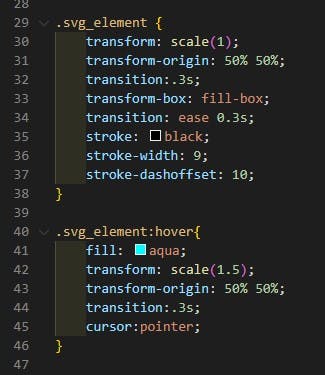
To activate the hover animation, we'll initiate a transformation on the SVGs by scaling them up by a factor of 1.5. Let's integrate these properties shown below into the mix. Additionally, feel free to experiment with the colours and strokes (which define the borders) to add your personal touch.
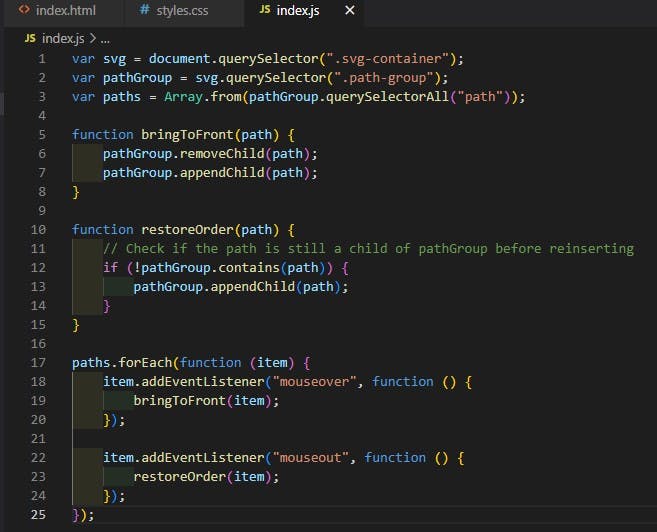
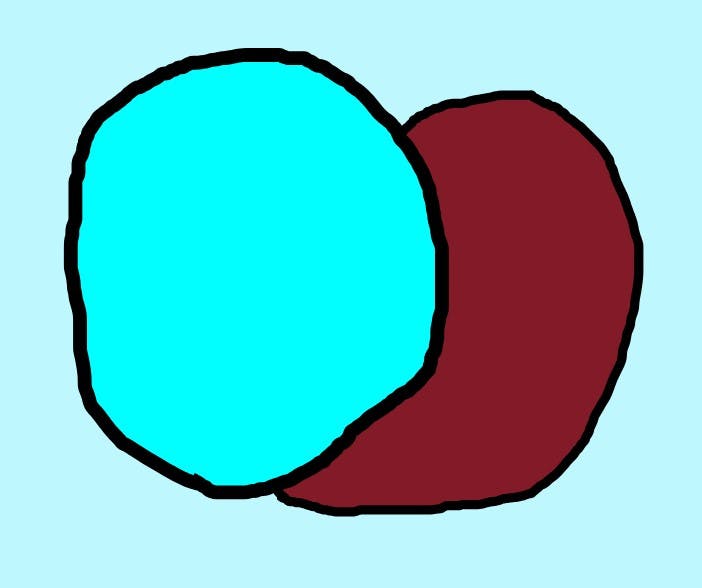
Give hovering over the images a shot – you might catch a small glitch. While the colour alteration is working, our intention is for the hovered SVG to appear in front of the other. Currently, one SVG stubbornly remains in the foreground. This is where JavaScript comes into play, and now is the opportunity to incorporate JS into our code.

JS
To achieve this functionality we will re-order the elements by removing them from the path group for a split second and insert the hovered SVG in front.
Firstly, create a file named 'index.js' in the same directory as your HTML and CSS file.
Import your js file in your html file in the <head> tag with <script defer type="text/javascript" src="index.js"></script>. Notably, the inclusion of the defer keyword is important. It ensures that the script execution doesn't block the rendering of the page, leading to a smoother user experience.
Sweet! With the hover functionality successfully implemented, we're approaching the final stages of our project. There's just a bit more to wrap up before we reach the finish line.
Moving forward, our focus shifts towards integrating the drawer feature. This drawer will open to reveal distinct content based on which SVG is clicked. Add another section to the page with the class drawer-right. Notice that the divs for content 1 and 2 start as hidden.

In our index.js we will now add 4 functions. But first, let us add more query selectors.
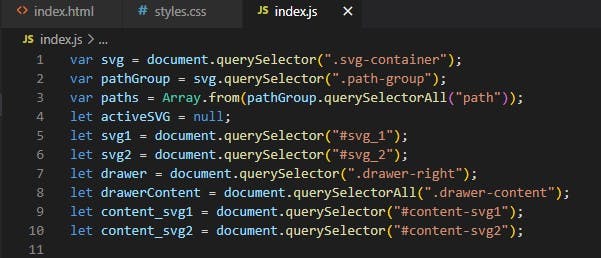
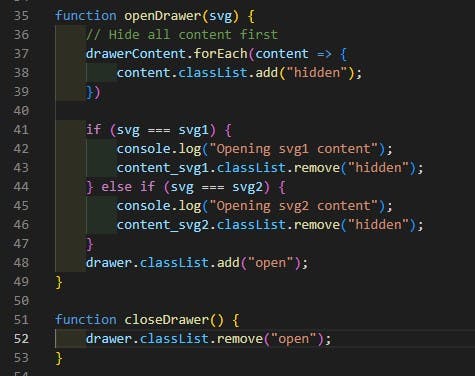
This is the open drawer method. It takes a parameter of 'svg' and removes the hidden tag from that specific SVG. If you want to add more SVGs you'd need to add selection statements for each SVG.
A quick reminder: our hidden class is responsible for setting the display property to none. By eliminating the hidden class, the content becomes visible for us to see.
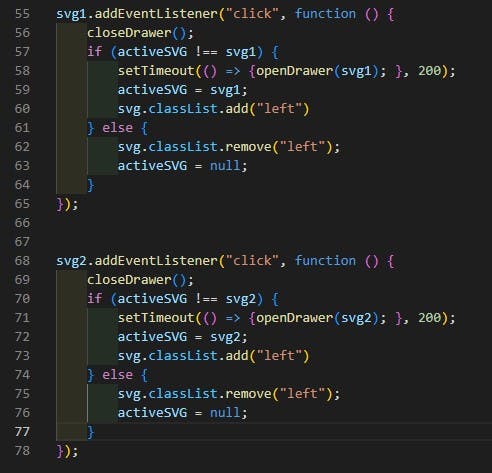
To open the drawers, we listen for mouse clicks on each SVG, employing event listeners. To ensure a smooth transition, we've also introduced a slight delay using a timeout before the drawer appears. Our secret sauce? A tracker named activeSVG. By tapping into this tracker, we can control which content surfaces based on the clicked SVG.
With the JavaScript logic for the drawer complete, our attention turns to styling. We're introducing the drawer element and positioning it off-screen initially, awaiting its grand entrance.
For a sleek opening animation, we're using a cubic-bezier animation. If you fancy adjusting the look of the drawer animation, a handy resource is cubic-bezier.com. This tool lets you fine-tune the animation curve to match your design preferences.
Styling is where aesthetics take centre stage, breathing life into your project. To make the SVGs move left too, add these transition properties to the svg-container. And create a new class called left as shown below. This is the class that is added to the SVG's class list when opened.

All that's left to do now is to make the drawer able to exit when the user clicks outside the drawer. This neat piece of code checks if the user has clicked on anywhere apart from the drawer itself, svg1 and svg2 (essentially the outside space).

That's all!
Thank you for reading this blog. I hope you better understand how the whole process works. All the code is linked at the top of this blog.
Watch the showcase of this animation again here:
https://www.youtube.com/watch?v=uusVQ-ZVHVE
If you're looking to build your own projects using this feature I'd love to see them. Also, feel free to message me for help on my email: thedoublewaysproject@proton.me